
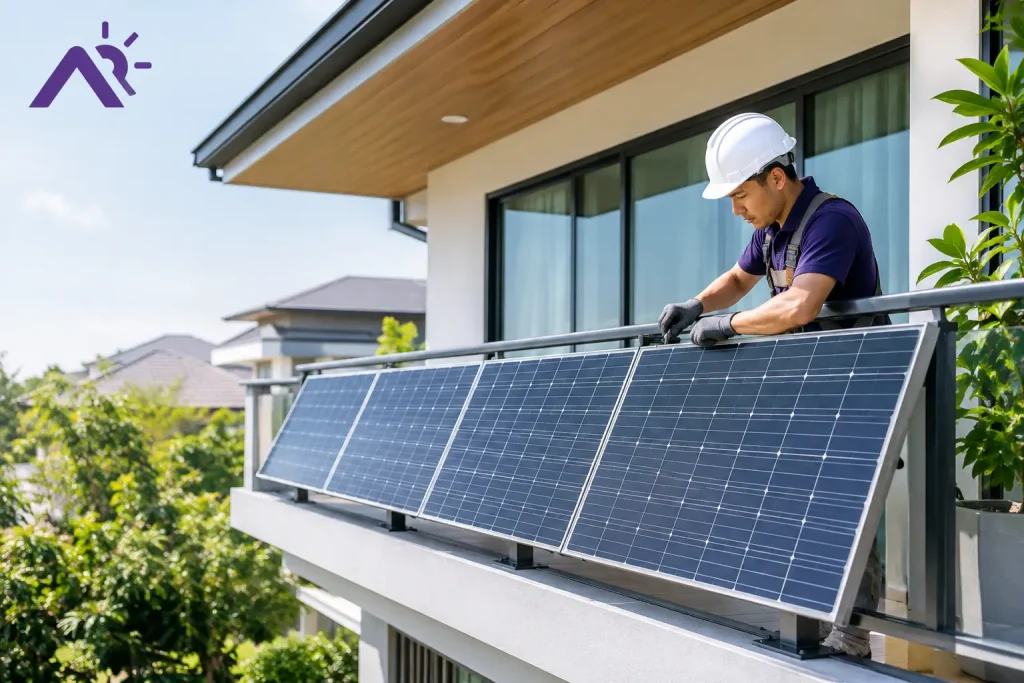
How to Install Balcony Solar on a Landed Home
Key takeaways
- Balcony solar works best when the mounting surface receives clear sun for much of the day and can carry the system load without movement.
- Panel orientation, shade, inverter selection, and cable routing have a bigger effect on output than simply fitting the largest possible panel.
- A plug-in solar setup should be engineered as a complete system, not treated as a panel-and-plug purchase.
- Monitoring is essential. It shows whether the system is producing as expected and when household loads can use solar energy directly.
A balcony can do more than provide outdoor space. For owners of landed homes, it can be a practical location for a compact solar system when the roof is shaded, occupied by other equipment, or simply not the best first step into solar. Knowing how to install balcony solar starts with a realistic view of the site: sunlight, structure, electrical connection, and daily energy use must all work together.
Balcony solar is usually designed as a smaller, modular installation. It can support daytime household loads such as Wi-Fi equipment, refrigeration, lighting, fans, laptops, and selected appliances. It will not replace a full roof-mounted PV system on every property, but it can lower purchased electricity during sunny hours and give homeowners useful production data before expanding their energy system.
Start with the balcony, not the solar panel
The first decision is whether the balcony is a productive solar location. A south-facing exposure is often discussed in general solar guidance, but local sun paths and actual shade matter more. In Malaysia, east- and west-facing balconies can still produce useful energy, particularly when daytime consumption is high. An east-facing array favors morning output, while a west-facing array can better support afternoon cooling loads.
Observe the balcony across a full day. Look for shadows from roof overhangs, trees, neighboring buildings, satellite dishes, awnings, and railings. A small shadow across even part of a panel can materially reduce output, especially where panels are connected in a simple series arrangement. If shade moves across the array, equipment designed to manage panel-level variation may be worth the additional cost.
Next, assess the mounting structure. The railing, wall, or frame must be stable enough to carry the panels, brackets, fasteners, and wind loads without flexing. Solar panels are designed for outdoor exposure, but they also create a broad surface for wind to push against. A panel that feels secure on a still morning may behave very differently during a storm.
Measure the usable space carefully. Leave clearance for doors, windows, drainage, cleaning, and safe movement around the balcony. Panels should not obstruct access or create a low edge that can be struck by people, furniture, or cleaning equipment. For many landed homes, a carport canopy or upper-floor balcony offers more usable area than a narrow decorative balcony.
Choose equipment that matches the energy goal
A balcony solar system consists of more than panels. The core components are PV modules, a purpose-built mounting system, a compatible inverter, protected cabling, isolation equipment, and energy monitoring. The appropriate configuration depends on the size of the available surface and the loads the owner wants to offset.
For compact installations, high-efficiency modules help maximize output per square foot. However, the highest-rated panel is not automatically the best value. A slightly lower-output module with stronger mounting compatibility, better shade performance, or a more suitable physical size can deliver a better real-world result.
The inverter is the system’s control point. It converts the panels’ direct current into usable alternating current and manages production within the system design limits. A microinverter or other panel-level approach can be useful when panel orientations differ or intermittent shade is unavoidable. A single inverter can be cost-effective for panels with similar sun exposure, but its performance may be more affected by one underperforming module.
Think about when your home uses electricity. If the goal is to reduce daytime grid consumption, solar production should align with occupied hours and active loads. If much of the household demand occurs after sunset, a battery or a broader home energy management strategy may provide more value than adding panels alone. The right answer depends on consumption patterns, not only on panel capacity.
How to install balcony solar with a secure mounting plan
The installation should begin with a site-specific layout drawing. This defines where every panel sits, how brackets attach, where cables run, and how water will drain around the installation. It also prevents a common mistake: mounting panels first and discovering later that a door cannot open fully or a cable route crosses a walkway.
Mounting hardware must suit the actual surface. Railings, concrete walls, steel frames, and carport structures require different fastening methods. Avoid improvised clamps, light-gauge hardware, or mounting points intended only for decorative loads. The goal is a restrained, rigid installation that keeps panels at the planned angle and does not transfer damaging force to the balcony edge.
Panel tilt is a trade-off. A steeper tilt can improve solar capture at certain times of year and shed rainwater more effectively, but it increases wind exposure and may be more visible from the exterior. A lower-profile arrangement is often easier to secure and can look cleaner on a residential facade. The best angle is the one that balances production, stability, drainage, and available space.
After the structure is installed, panels are fixed with approved clamps and specified torque. Cables should be supported rather than left to hang, with no sharp bends, pinch points, or contact with standing water. Protect cable runs from UV exposure, abrasion, and accidental pulling. A neat cable route is not only an aesthetic detail. It improves long-term reliability and makes inspections simpler.
Connect the system safely and verify output
Electrical connection is the point where professional execution matters most. Solar generation must be matched to the home’s electrical design, inverter specifications, cable capacity, and protective devices. Never attempt to feed solar output into a household circuit through an improvised adapter, extension lead, or unverified outlet arrangement.
Before the system is energized, installers should inspect every mechanical and electrical connection, confirm polarity, test insulation, verify inverter communications, and check that all equipment is operating within its intended parameters. The system should then be observed under sunlight to confirm that panel output is stable and that no component is overheating or showing a fault condition.
Production figures should be treated as estimates, not promises. Weather, heat, dust, orientation, shade, and household consumption all affect the result. A clear performance baseline during the first few weeks makes it easier to spot issues such as new shade, a loose connector, or a panel producing less than expected.
Use monitoring to turn generation into savings
A balcony solar system creates the most value when the home uses its output as it is generated. Monitoring helps homeowners see production by hour, compare it with household demand, and shift flexible loads to solar-rich periods. Running selected appliances during strong daylight can increase self-consumption without changing the physical system.
Cloud-based monitoring also supports practical maintenance. Review daily and monthly generation trends, especially after severe weather or nearby construction changes. Clean panels only when dust, leaves, or residue visibly affects the surface, using methods appropriate for the module and mounting arrangement. Do not step on panels or use abrasive materials.
For homeowners who want a smart starting point, Amsolar can pair solar engineering with monitoring and home energy management capabilities so production data becomes an actionable cost-control tool. A well-planned balcony installation is modest in scale, but it can be the first measured step toward a more efficient home energy system. Start with the sunlight you have, build for safety and performance, and let real production data guide the next investment.
